You can add a glossary to a project in two ways:
- By uploading a Termbase Exchange file (TBX) to a project.
- By downloading a glossary template spreadsheet. Filling up terms and uploading it to a project.
To upload a Termbase Exchange file (TBX) to a project:

- Click on a project or hover over a project.
- Click the Assets icon in the right corner.
- Click the Termbases(tbx) tab.
- Click Choose file to upload a TBX file.
- Select a language pair (job) if you want to use the TBX only for the particular language pair of the project. By default, a TBX file will be applied to all language pairs of the project.
- Click Add file.
To add a Glossary using Glossary template:
- Click on a project or hover over a project.
- Click the Assets icon in the right corner.
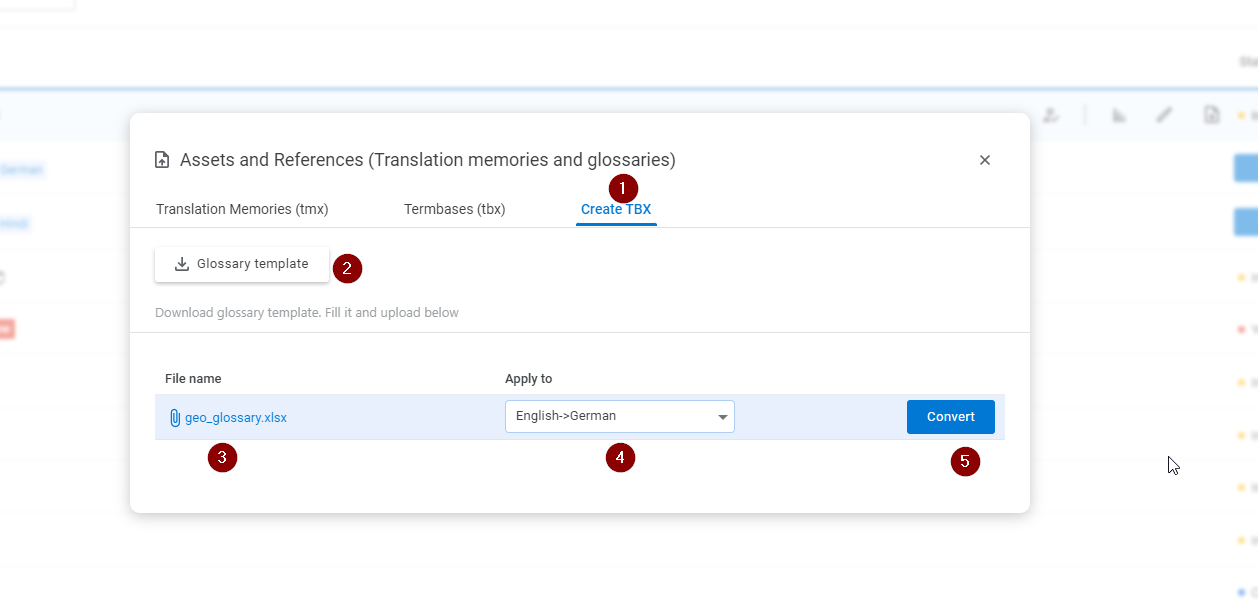
- Click on the Create TBX tab.
- Click the Glossary template to download the Glossary template spreadsheet.
- Fill up source language and target language terms in the Glossary template file.
- Click Choose file and upload the Glossary template file.
- Select a language pair to apply.
- Click Convert. This will convert the uploaded terms from the Glossary template file into a TBX file.